The Tempest
The task for this project was to make a boat in a 3D model, a technical drawing, concept art and 2d sketches. This boat had to be based on the play 'The Tempest' and therefore had to be fitting for royalty. I chose to do a royal yacht that would be set in the 1950s that would carry someone like a young Queen Elizabeth. This meant that historical accuracy had to be maintained. We had 5 weeks to complete this project so it was slightly shorter than most.
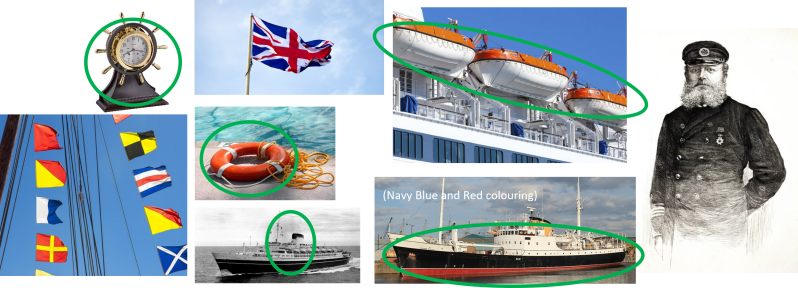
Initial Ideas Moodboard

Context

The Tempest is a well known and well run story but to alter it in an original way will be a challenge. This is why I intend to make a more of a surreal and less hyper realistic inspired story of shipwreck and survival. Now, obviously I wont actually make this picture, but they way I am approaching Unit 8 is that I am taking the role of Art Director on a film of the Tempest that has taken a more cinematic approach than that of a drama focus. This would allow for my job in this to be as creative as possible visually and be able to be very explorative when making the concept art.
These are initial mood boards used to convey the ideas of my work. The film ‘Life Of Pi’ has played a huge part in the inspiration for this piece of work. It has very strong visuals and is used to portray the boats scale in comparison to the vastness of the ocean around it. This will be used as a tool in my work. Roger Deakins is a cinematographer who’s work using silhouettes will also play a huge part in the concept art for this project this allows the boat I am designing to be inserted into the scene and gives it the ability to stand out a lot and make more of an impactful piece of work. Loneliness in composition will also have to play a big part in this to ensure that the boat looks like its lost and not in control therefore helping the pieces communication of the idea of fear and worry for the viewer which would be felt in the situation of a shipwreck or being lost at sea. To find the inspiration I used scenes from Games like Death Stranding, and then from a few films like Ad astra, The Martian and Interstellar.
Time Period Detail
This stage is important, as there are essential details that will need to be included and excluded from the model in order to make it an authentic 1950s royal yacht. Details like no modern lighting or recent electronics including alarms, lights, screens and even certain ways of architecture like the use of a lot of glass wasn’t popular until long after the 1950s so it was likely that instead of large windows they would likely have much smaller windows but just more of them. They would also have had much curvier features and it would be less angular than modern sportier ships are nowadays.
DO INCLUDE:
These are the architectural details that should be used to show to the viewer the exact time period of the piece and that should help communicate instantly with the viewer.
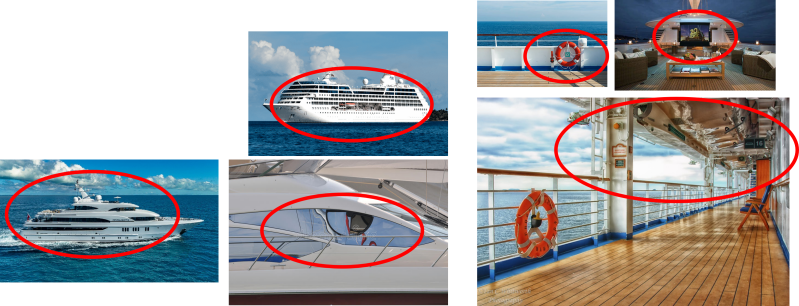
DO NOT INCLUDE:
These are the architectural details that would be important to remove to maintain full truthfulness to the time period. Scale is also important to maintain as there aren’t that many royal yachts that are really big so its important to make sure that their scale is accurately represented.
As you can see on this deck there is lots of wiring and lighting and buttons visible. This is all detail that will have to be unincluded from the final version as they're not era appropriate. There are also examples of modern signage that cant be included as well. The other things not to include will be shown in red circles.
Location

The background to these pieces of work isn’t as important as the boat that I am designing, however I do think that it's important to have a well-researched setting else it can lose some of its effectiveness as a piece.
MUST HAVE:
- Sandy beach
- Blue sea
- Idyllic style
- Palm trees
- Greenery
MUST NOT HAVE:
- Any signs of civilisation
- Modern elements
Movie Inspiration


The Titanic was used mainly as inspiration for the boat design and time period details. The Titanic had a lot of different methods for showing the boat with mixed use of CGI and actual models. This helped me to see the full design of it and get as much detail as possible.
‘Life of Pi’ was a huge inspiration for me as the boat is almost perfectly fitting with the time period and the style. The weather of the crash is also fitting as it suits the tropical style that I am aiming for. The style of cinematography and the framing of the characters on the open ocean. This was a good way to show how lonely the character is and this is going to be a huge part of how my work is framed. And therefore how it presents itself to the audience/ viewer.
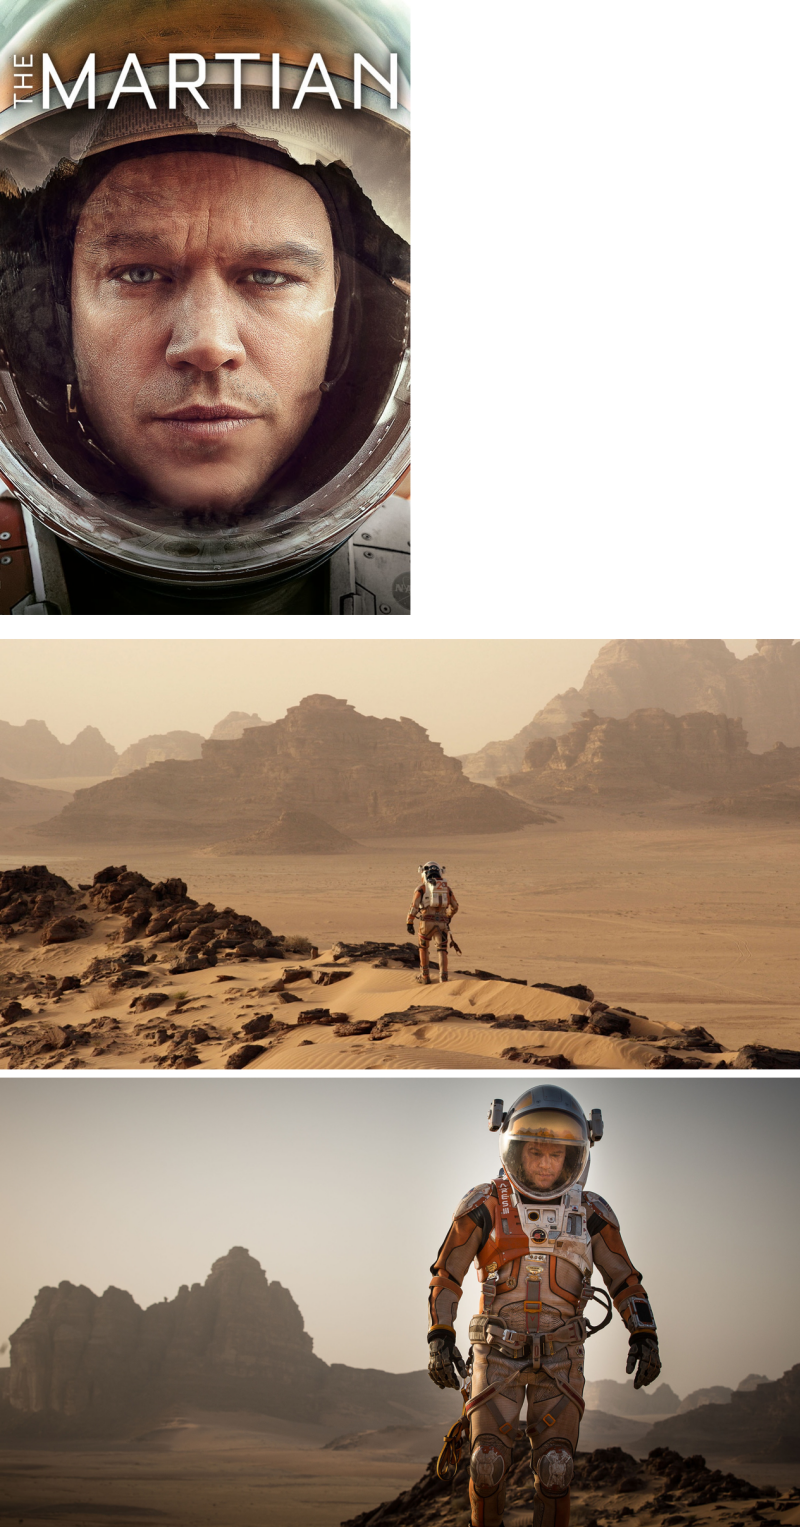
‘The Martian’ was again a huge inspiration, not because of its aesthetic or its topic. However it was more to do with its themes of journey and adventure and then by the climax the themes of loneliness that it presents and also how its shown using its composition which is something that I have discussed in the slides previously
Concept Art
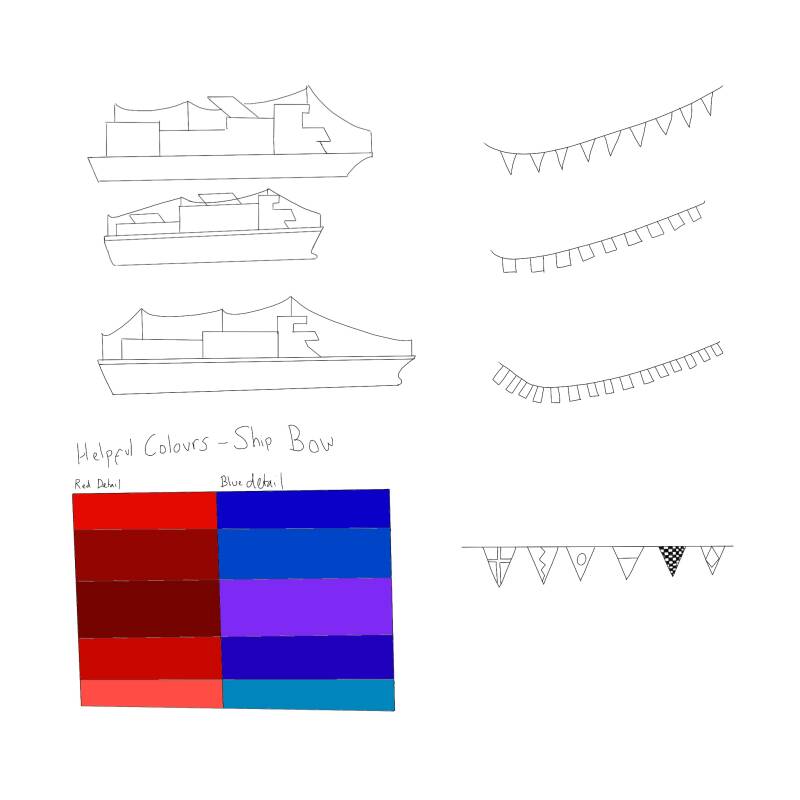
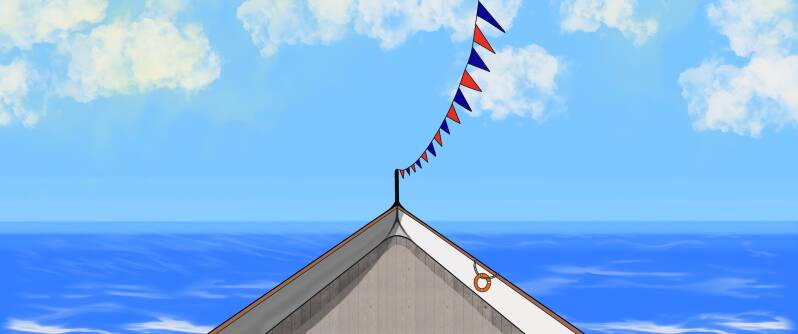
These are the very brief concept images that I made using procreate, the first few are side profiles of the ship that I wanted to make, after that I made a few colour of combinations to know what would look best near each other, this was one of the first times that I have worked with Procreate and with colour experimentation so seeing this part of the process is important. The others are brief experimentations with flag shapes and variations. This is important because the ships flags are such a huge factor of the design that have been mentioned throughout the project. So experimenting with these was essential.
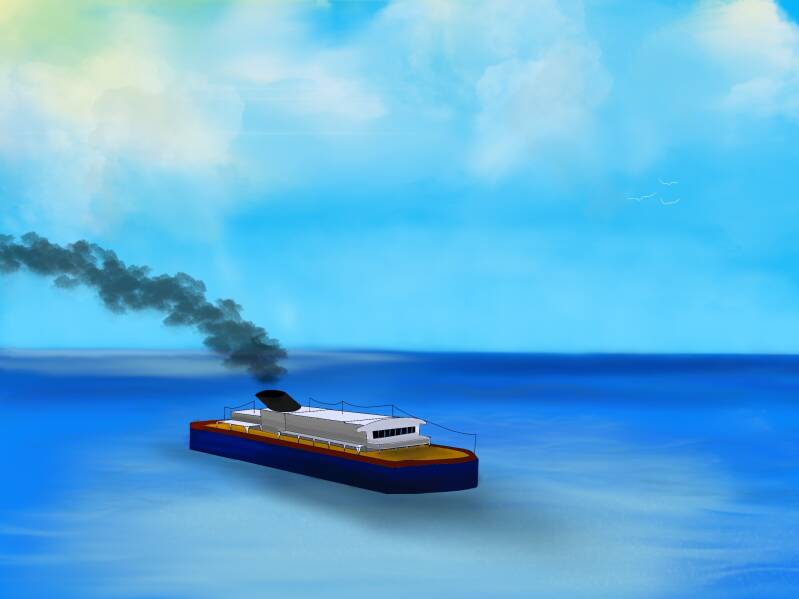
These 2 pieces of art where done to show what the boat would look lie out on the open ocean, and therefore help me to gauge a better idea of what my final product will look like. These were also done on Procreate as a first time for me.

Textures
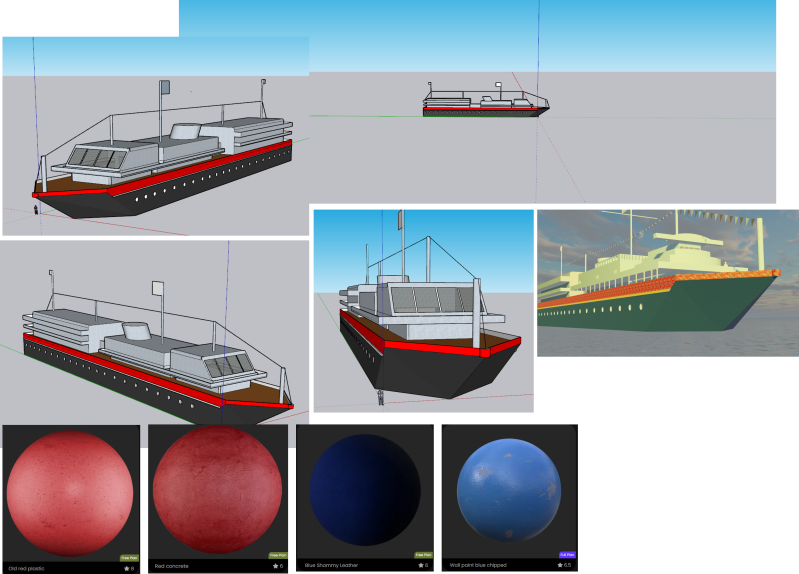
Above are a few of the texture I took from Blender kit, and what they looked like before being applied, adjusted and lit. I think that this is an important point to show as there are often huge differences between what is shown on the website and how it actually comes out.
These are what the textures ended up looking like when on the model and what they actually cam out like. This is an important distinguishment as they often look very different in varying lighting. The ones to the left are what the first model looked like in SketchUp Pro, and then the ones below are how it came out in Blender when lit correctly and rendered using Cycles and Eevee


Test Renders
These are the renders I did before I used cycles I just wanted to show some quick and easy angles that I could use. This allowed me to get a brief idea of how the final renders would look in a short space of time. The render engine I used at this point was Eevee. I am pleased at the way these came out as I could experiment using lighting and various HDRI’s and this allowed me to decide what time of day I wanted and what lighting I was going to use.
Technical Drawing
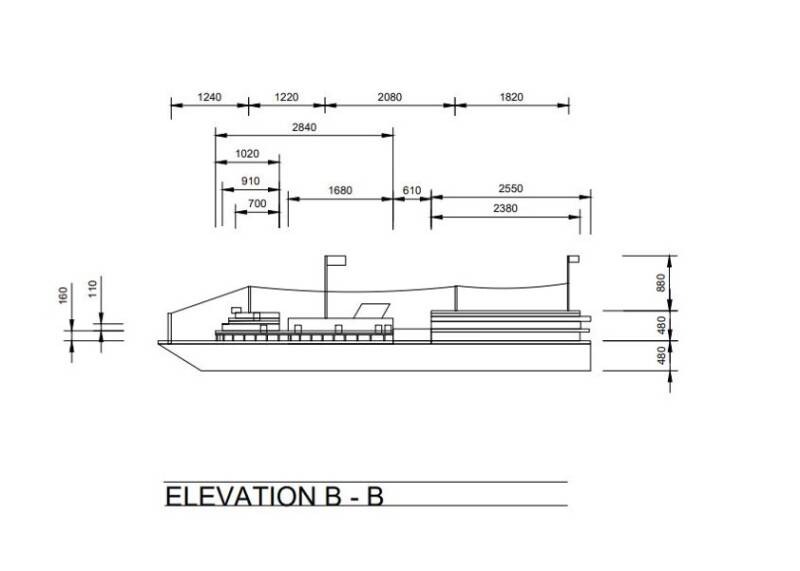
This is my final technical drawing. This was done on Autocad. And shows the way that the boat that I designed was measured and built. This is an important part of the project to show what sort of scale and size of the ship that I was designing. To get these scales correct I did a bit of research on smaller sized cruise ships and then used that information to make some approximate detail


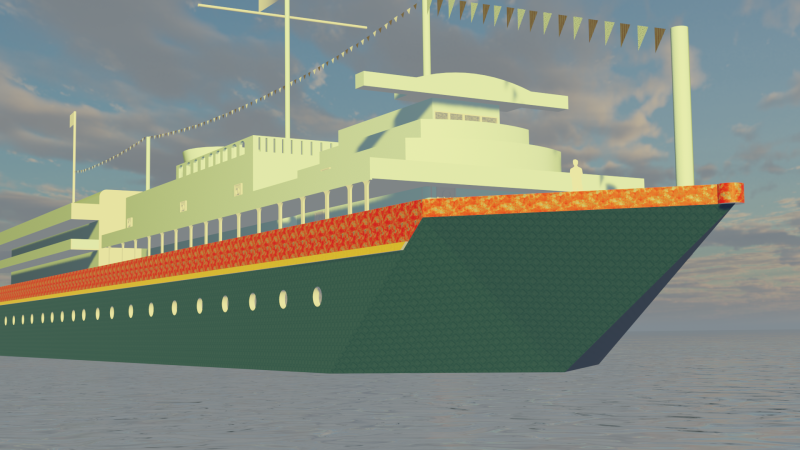
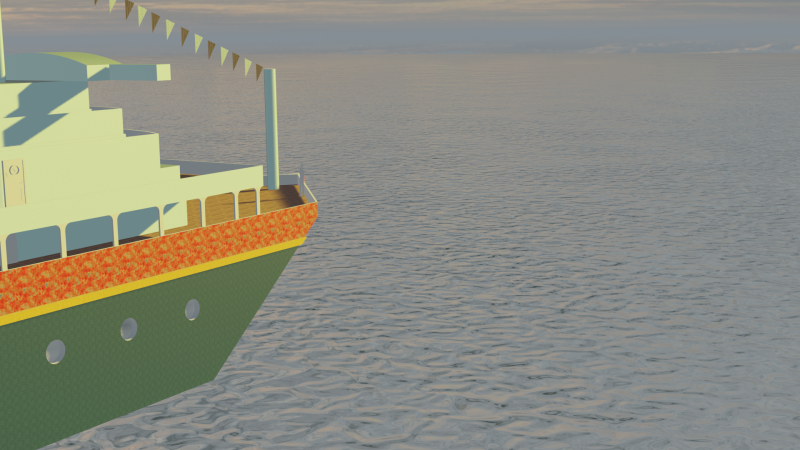
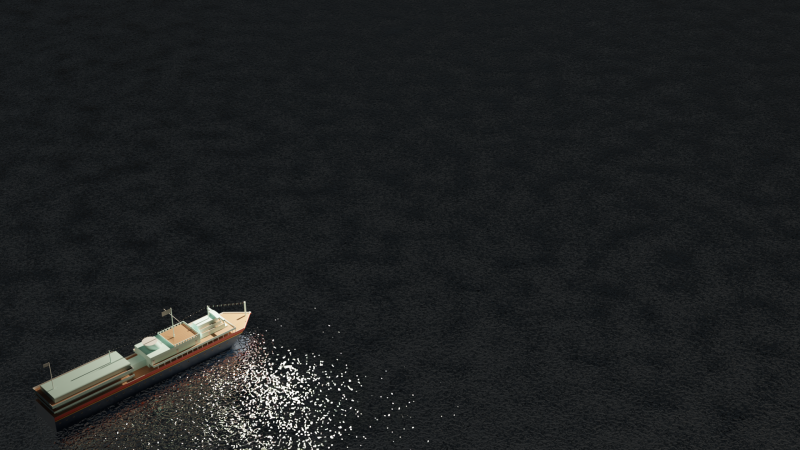
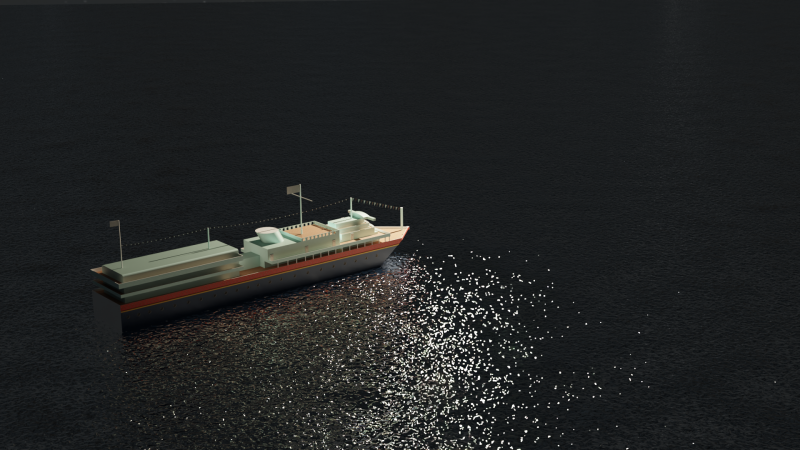
Final Renders
These are the final rendered shots with the night HDRI. I also made the ocean using a Glass modifier on a plane to make it, this I had to learn from Youtube along with a few self taught tricks. The model is a second version of one I made when using SketchUp Pro and then imported it into Blender as a .obj file. This made things easier for me as I am not quite as experienced with Blender as I am with Sketchup Pro. I lit them using a few lights around the ship, some of the shots were made intentionally to reflect off the water. They were rendered using Cycles. These shots carry on over the nest 2 pages.


Concept Art vs Final Render


This is the comparison of what I had in mind when I made the concept art compared to what it looked like in the final vision, apart from the time of day the 2 boat designs are almost identical and this shows how helpful the initial concept work was to the creation of the final product.
Create Your Own Website With Webador