
'The Girl With The Mousy Hair' (2022)
For this project we had to choose a film to work on in groups, each director presented the film to us in hope to encourage us to choose to help them with it. we then voted ofr what we wanted to work on and then were put into our groups. I was given my first choice namely 'The Girl With The Mousy Hair'. We were each given titles and jobs to do as a part of this project. My title was production coordinator and with this I would be in charge of organising the incoming props and organising prop house visits as well as deciding how many of each props we would need and help to narrow down where we focus our attention from a production side of things.
Research
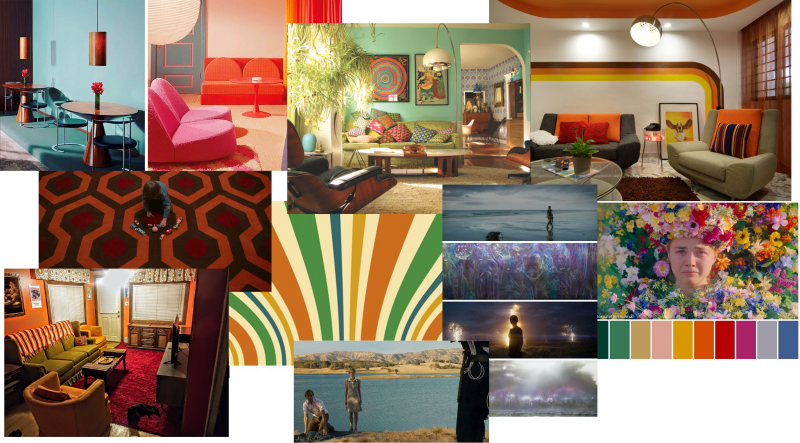
We were given another presentation from our directors and producers and this helped us to work out exactly what we needed to do to make the set what we wanted. This at first was a real challenge as there wasnt at this point a location that had been chosen so we started off by creating moodboard off of the script that we were given. This was something that i had created in order to display the ideal look of the 70s era colorful theme that we were given by our director. As well as the fact that there was an idea to keep the horror movie a colorful one. This inspired me to look into colorful horrors and thrillers such as Midsommar (2019), Annihilation (2018), Zodiac (2007) and of course The Shining (1980). This helped our production team to visualise what we were aiming for at an early stage.
Concept Art


These images are of concept art done by myself on Sketchup. This proved a successful tool in the end as we were able to show the producers what we wanted to aim for and this way we were less likely to make a decision that wouldnt be liked by the producers. We also were able to save costs this way as previously we would have had to take risks when making the decisions on props and vinyl however this way there was a safety buffer first. This also gave us something to work towards when we were putting up the set as we could see what needed to be done very quickly. This proved a very helpful tool in the end.
Before Images
After a few weeks of interim uncertainty the producers told us that they had now confirmed a shooting location and that we were able to begin the planning stage of creating this set, the only issue was that we only had about 14 days to complete this part of the project which was extremely tight considereing we had a very thin line of communication between the person in charge of our team and the producers meaning that most of the questions that we had would take a few days to get a certain answer from this made our job very challenging andd would be something that i would try to imporve upon for next time. The location chosen was a victorian house in Walthamstow in north London. It was ideally going to be an already 1970s themed house however this was at late notice already so all we could do was use what we had and attempt to transform the victorian house into a set that we could create our 70s horror.
Below are the 4 rooms that i had to coordinate setting up and filling with props. There were other rooms but there was very little we had to do in it.

Kitchen

Rear of House

'Trauma Room'

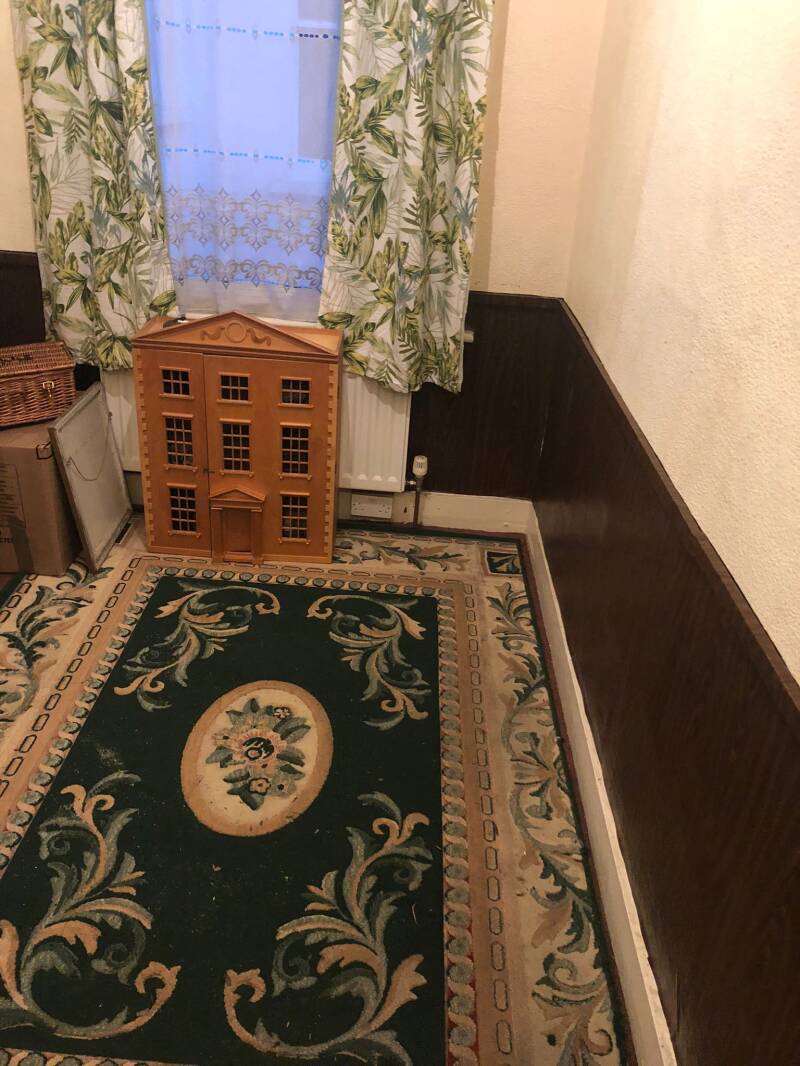
Girls Bedroom
Once we had seen these rooms the challenge became to fill up the rooms and remain under our £500 pounds budget. our first step was to create concept art for these rooms which was done by our set designer and were an incredibly successful part of the project as when you compare the concept art to the final work there is very little difference between them.
As production coordinator i realised it was likely the most viable plan to source all of our props from a local prop hire. This meant going to the hire and choosing from there warehouse. they would then give us a quote for those things and this would enable us to have high quality, movie standard props in our film. However after a bit of thought and calculation we worked out that the cost of hiring all the props as well as a van to safely move them in this would cripple our budget on just props.
This is an email i sent to the Prop house showing what we needed from them as well as my student ID as they offered a student film discount. This was after a more detailed meeting me and group member Heather had with them a few days prior to discuss price and how the logistics of it worked.

This is the email we received back from them and at this point we hadnt been told about the large deposit so werent aware of the damage this would have on the budget.
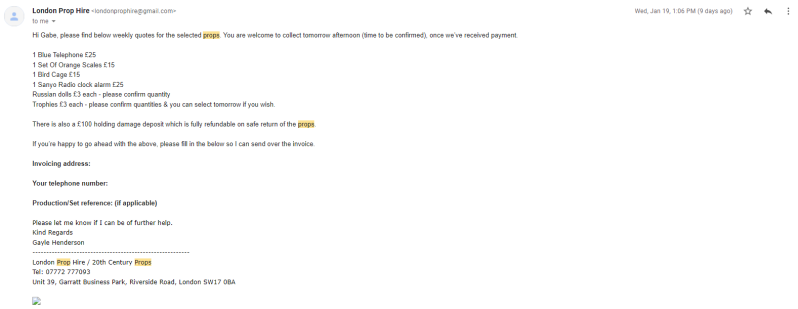
We had only 4 props in the end and it can to £86 plus £100 for a security deposit which was all of our props budget on just 4 items. This left us at a standstill. Until someone had a look into a furniture charity shop that had a lot of large props for only a few pounds. This meant that the cost of the props was a lot less and we had no need to worry about the safety of each of the items as if they did break it would be a problem. This cut our props cost by about 75% and made it far more viable to fill out sets with useful props and therefore make our scenes look more full and visaully interesting which was the look that the director was going for. This was a successful result for me as Production coordinator
Vinyl
The next task was to work out how to cover the walls in a way that was removable, like wallpaper however we would have a large issue trying to remove wallpaper successfully from paint. Our tutor had previously suggested a technique using vinyl, this is like sticky back plastic an can be reversed after a few days using the heat from a hairdryer. So we went with this approach to it. The first step was to measure out the spaces needed to be covered with the vinyl. This was done on the first day of viewing the location. We took photos and measurements so we knew what we could do with the space.
The measuring of the vinyl became a very difficult task on such a low budget as we didnt have a particularly high margin for error. Set designer Nathan Hoad converted the mesurements into images so it was easier to visualise for us.


Once we had measured out the room it was just a matter of converting these measurements into meaasurements that we could order the rolls of vinyl in. This was done by me as production coordinator. These images show what process i took to find the exact needed vinyl colours and in what size, I added about 25% extra to it all in totak as a margin of error had to be accounted for with these sorts of things as you cant guarantee nothing will go wrong on set.


Final Set
This was an email I got to confirm the order of the vinyl as well as the exact dimensions of the vinyl i ordered.
This is the after image of the trauma room. This room was more simple and was mainly about doing the vinyl panelling around the walls. Which in the end looked very realistic. This was started by me and Nathan Hoad ( set designer ). Nathan was ulitmately the one who finished this room however.

This room was done by our Alexa Phillips ( Art Director ) and Cecily Pelling ( Prop Designer ). The sunflower yellow vinyl was measured and ordered by me, the group members cut it and then applied it with success and transformed the room into the 1970s themed kitchen that we had hoped for. This room was a very successful transformation for us.

This room was done be myself ( Production Coordinator) and Heather Kimbrey ( Production Designer ) this included the entire back wall was vinyled, posters were applied to the walls, along with hanging dolls and a toy parrot, all things we sourced from antiques shops and charity shops. The bed was sourced from someones personal belongings along with a few of the other props. This room was one of the biggest tasks so we knew we had to start it early as we only had one day to put all the sets together. This task was completed in just under 5 hours. This task proved successful.
Filming
Throughout filming there was very little for all 5 of us to do in the however there was often calls for continuity changes and moving props on the go according to the directors intructions. The continuity changes is an essential part of the process as if a prop is chaged between takes it creates an error that is noticeable to the viewer and therefore we have to make sure that these errors are minimalised as much as possible. This is a form of quality control. The directorial changes are also important to be able to react fast as if the director decides they prefer the look of a prop or set in one way and they want it that way that would be our job to adaot in the moment and make sure that there vision is upheld and therefore they are able to make the movie that they want to. This is also a form of quality control.
Set Stripping
The next stage after the set was set and then used was to remove the set from the house with as little damage as possible and then put the house back into the order that we found it. The best way to go about this is to take photos before hand so that you have the perfect reference for what it should look like after. The images showing the house before filiming (Above) were the ones that we used as reference. For us the main issue was going to be removing the vinyl from the walls without removing paint or plaster. This was successful in 2 of the 3 rooms that we ended up applying the vinyl to. The technique we used which was to soak to wall first with soapy water and then use a hair dryer to remove it all. The only room that proved troublesome for us was the 'Girls Bedroom'. The paint that we applied the vinyl to proves too weak and it meant that when we removed the vinyle the outer layer peeled off of the wall. This created issues when we finished the room and resulted in the decision to repaint the room using paint from a hardware store local to Walthamstow. This ended up being successful and only took us an hour or so start to finish. From there we just had to move the props out the rooms and into a van that we had hired to move the props from the shooting location to my flat for storage. The taking down of vinyl and props took less than a day for all 4 rooms and proved successful for us.
Organisation throughout process
The task of delegation of jobs and organisation of personnel both in pre production and during filming fell to our production designer Heather Kimbrey. However to organise my tasks personally I decided to make a task list which would allow me to track the progress of the tasks and then tick them off once doen to let me know how much I had to complete at once.

As you can see all the tasks were completed apart from the prop hiring as we have discussed so far that it became fiscally unviable to persue prop hire as a form of finding props for our movie on this low a budget.
End Images


Create Your Own Website With Webador