
The Beasts Bedroom.
This task was to create a set for a film fo our choice, however the twist was that the set this time couldnt be included in the actual movie but instead something of our own creation. We were selected partners from an adjacent course and they were tasked with creating a prop to fit into the newly designed set.
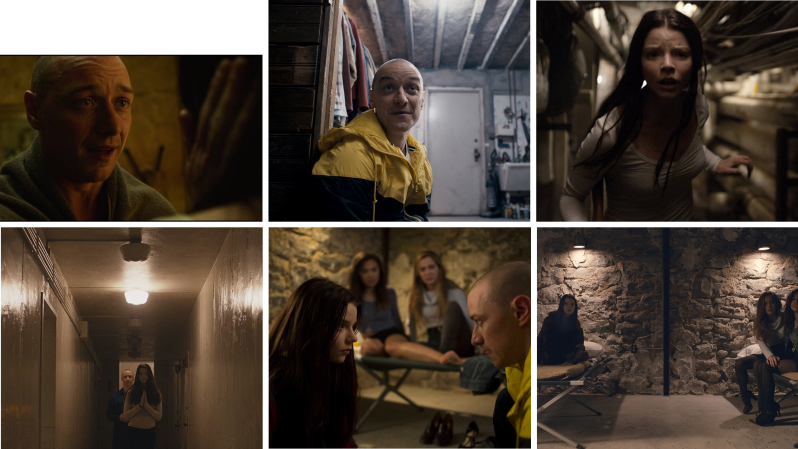
The first challenge for us was to communcate and decide which movie to pick the set from, the intial ideas included mainly set heavy movies such as "The Shining" 1980, or "The Grand Budapest Hotel" 2014, and even movies like "Star Wars: A New Hope" 1977. These however were decided to be too likely to be replicated by other teams and we decided in the end to go for a more understated movie in which we would be able to explore the mind of a violent animal like character accurately named "The Beast" from the movie "Split" 2016 directed by M Night Shyamalan.
This movie was a horror about a man who dealt with his trauma by creatiing 24 personalities in his head with 1 key protector of the main body. This character has super human strength and skin that can survive gun shots at a close range. The only catch is that he is a murderous animal who has to feed on living girls in order to maintain his strength and ultimately protect the original personality, Kevin, from ahrm
This movie is a sequel to a movie called Unbreakable (2000), by the same director, M.Night Shyamalan. Unbreakable was about a man who discovers he has supernatural powers when he is the sole survivor of a train crash. He then goes on to research the extent of his powers. The sequel was going to be made shortly after however M.Night Shyamalan found issues getting funding for this sequel and therefore froze the project for 16 years until he came out with Split, a movie that wasn’t confirmed to be a sequel until the end of the movie. It then finished with Glass (2019), 3 years after that. This movie expanded on the backstory of the ‘Horde’ as Kevin’s personalities come to be called.
In the end we elected to make a bedroom for the Beast, though we never see him sleep or even rest in the movie we thought itd be a nice touch to have that he has a space that he uses to live and move in. As well as a space where the other character might leave food and items for him to eat and use. Once this was agreed upon we were able to start making initial assumptions and moodboards about what sort of thing the best might have in his room
Moodboard made to display ideas used to creat final product
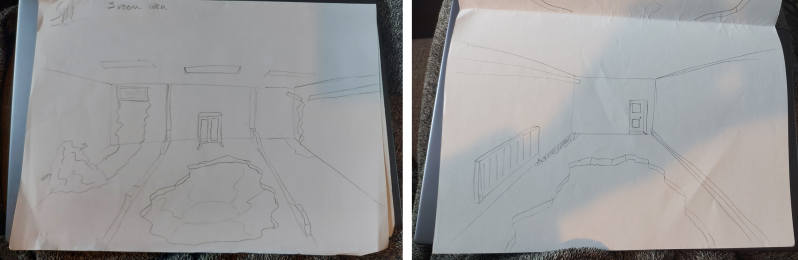
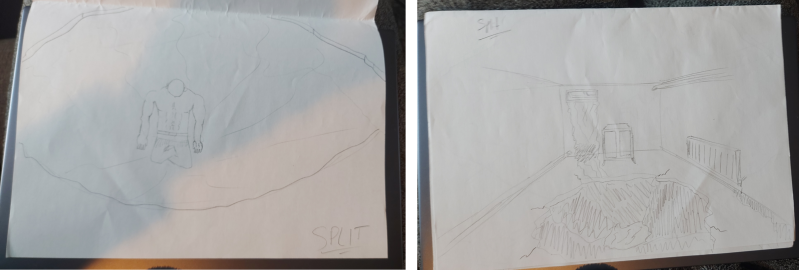
Brief concept art do communicate ideas between my pair and show my ideas
Underground Architecture Research

The technique to getting this set that I am making to be effective as a horror movie set is by ensuring that it maintains an scary and uncomfortable feeling, and to replicate this I found that there is an area is Guernsey in the South of England, that was for a time held by the Nazis and therefore was fortified and used to hold troops during the second world war. Not only was it a fort, it was also a hospital for injured Nazis, and by its nature the hospital was home to a lot of Nazis deaths which has lead to a few claims of hauntings in the area. This has meant that a lot of people when they are in the area claim that they experience an eery and uncomfortable feeling
This is the reason that I chose these tunnels to research in the first place, they have a lot of similarities with The Beasts bedroom.
This research area again has the same idea of being an underground area with a scary and worrying atmosphere. This choice is perhaps more accurate as it is recently installed, as is the most of the set of the movie Split, this is important as that plays a major part in the aesthetic that a movie has, and if the tunnels look more run down and ropey then it gives a different effect on the movie and it changes the movie that it is.
3D Model
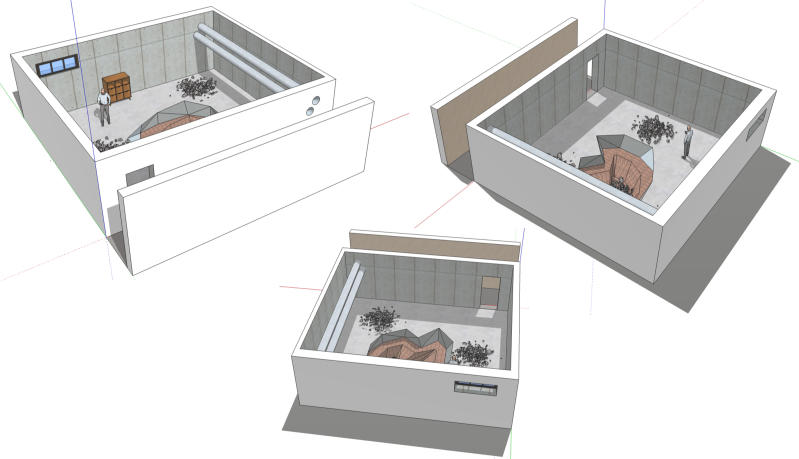

This model was done on Sketchup by me. I added models off of the warehouse such as the cabinet that represents Kristins (Group Partner) cabinet prop. As well as the rubble on the floor by the pit. Other than those details it was mainly about showing the set and communicating an idea of the room to Kris so that she knew where I was with the work we were doing.
Technical Drawing
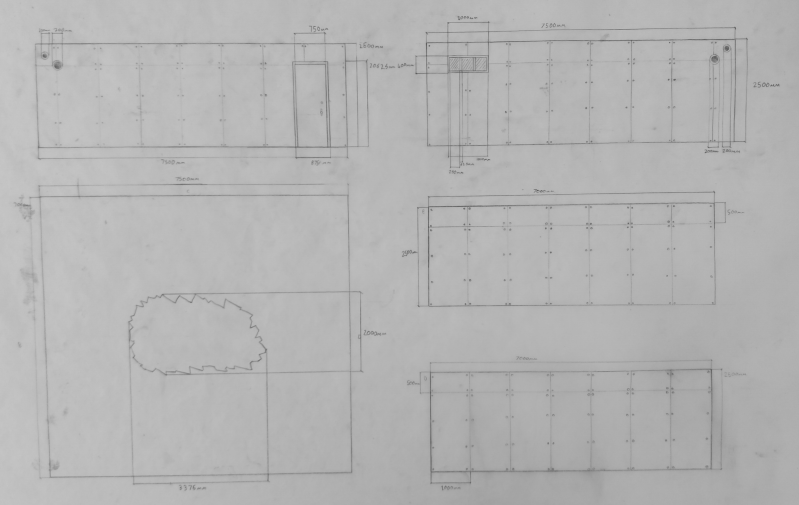
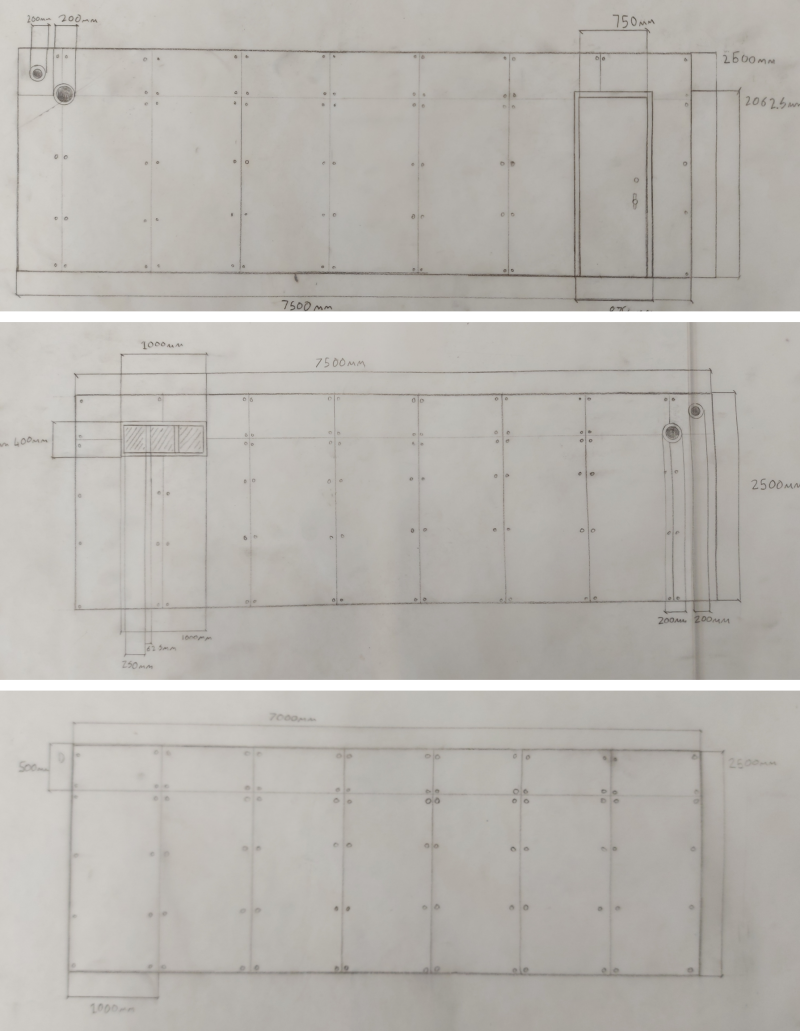

This is the technical drawing that I have made to show the more close details of the model set that I intended to make. There isn't much detail on the wall of the actual set, so I looked up types of concrete walls and this is what I ended up with. I was also able to copy this design onto the walls of the 3d model that I made on SketchUp, this helped me to be able to accurately visualise the set that I am aiming to make. I chose not to include the pipes but I did show where they started and finished on wall A and C. I added in the window frame and made sure that there was full detail on those areas. This was done to further communicate the direction I wanted to take the set in.

Studio Plan
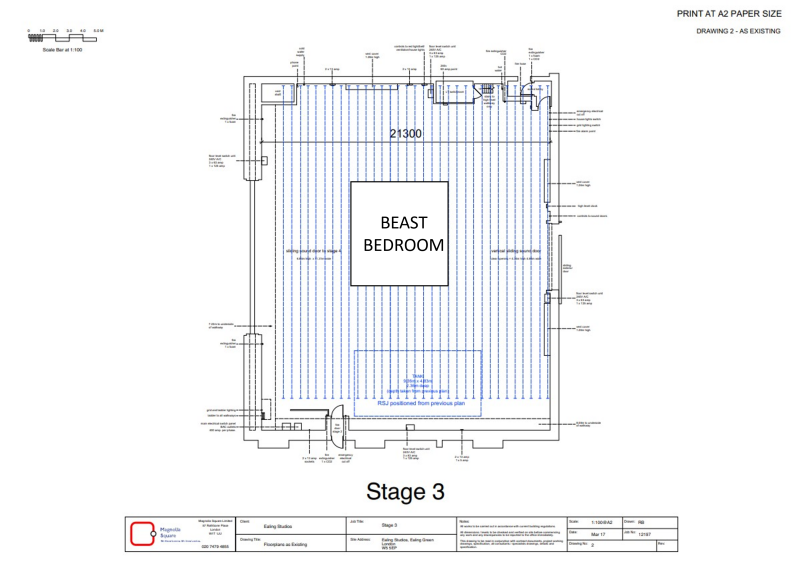
This is my studio plan, this displays the room that the set would take up in a studio. This allows you to work out the logistics of filming ina location as well as costs and timings. The studio I used was stage 3 at Ealing Studios. This studio is 10 m tall as well which would allow me to build the set on a raised platform and then have a pit that can be used as the dug out hole in the centre of the floor. This will also allow an availability to have high up shots looking down onto the set using cameras on cranes. This has also allowed for a large amount space around the set meaning that there wont be difficulties with spacing and room around the set. I have tried to keep the amount of space to a minimum however as because this is a small set theres no need to go over the top with this as it only wastes money.
End result
The end result for this unit was to make a well made technical drawing of the set we intended to make as well as a 3D model. Both of these were a success as you can see above. I thought it was a shame i was unable to make a physical model as I have done previously. This would have helped I think to communicate the way I wanted to set to look a bit better however I am happy with the progress I ended up making on this part of the unit.
Create Your Own Website With Webador