This projects aim was to accrately recreate the set of a movie. The movie that I chose was Blade Runner (1982), and I chose the Tyrell Corp interview scene to stufy and work out how it went.
Blade Runner 1982
I chose this room as it has quite a lot of research pre-existing about it and therefore makes the darker areas of the Blade Runner (1982) set a bit easier to work out what was happening in them. It also has a lot of measurable reference points i.e. the floor tiles. This gave a repetitive pattern throughout that was easy to comprehend. This is another artists piece of work that shows the measurements and the tiling of the room which is helpful as the scene doesn’t elaborate the setting of the walls very much and is mostly conversational so to have the image below to work from is very helpful.
The project was ambitous as I had to accurately recreate the set of the Tyrell Corp interview scene from Blade Runner. The struggle is mainly baout working out the size and dimensions of the set and then being about to make those lengths that you have made look correct in shots and add up correctly.

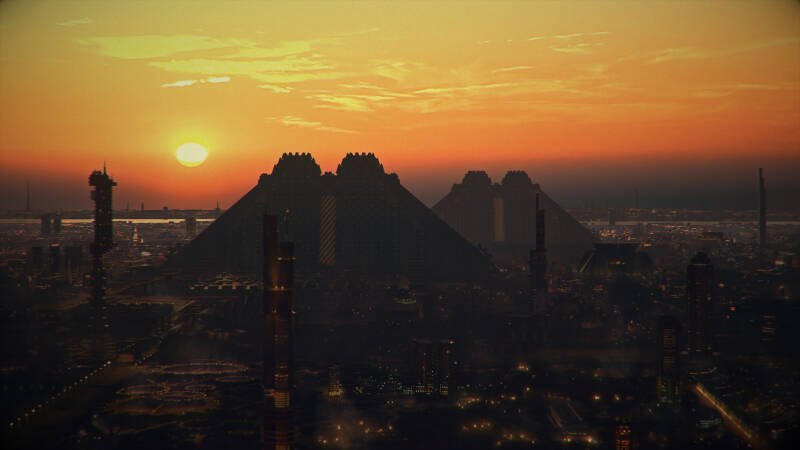
This was an image that I found online of another artists interpretation of what this set would look like and I used this as a template for my final model. There are areas of this model that i didnt agree with so for this reason i didnt completely copy. For example the window frames as you can see at the top of the image dont seem tomake an appearance in the movie so i knew that it wasnt a set model that i could trust completely. Me and my tutor both agreed that i should try and work other parts of the model out on my own using my own workings out.
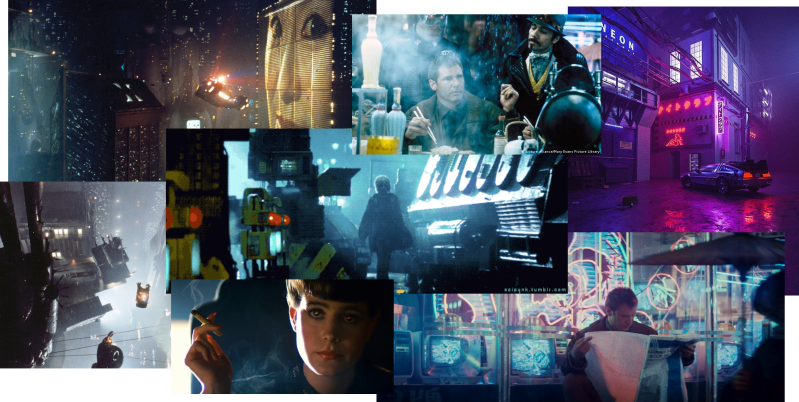
This is a mood board that I made to show the aesthetic of Blade Runner and the Cyberpunk style.
Interview Scene - Tyrell Corporation Offices

These are images that are showing the 4 walls of the set, I have put this here to show what the room i was trying to make looked like just to give some perspective to it. 2 of these images are what i also used for the final image comparison.
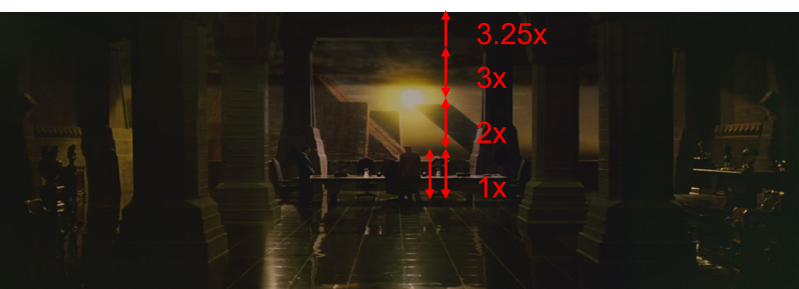
I split the project up into a few stages so that i could make it easier to approach as this was quite a big task to take up. The first stage was RESEARCH this involved working out all the measurements of the room which was done by using the size of actors like Harrison Ford to work out the height of the ceiling, which i deemed to be about 3.5 times his height which got the calculation to 3.25 times 185 which got the total of 601.5cm which i rounded down to 600cm. Research was also conducted into the style of cyberpunk, as is the result of the Mood Board above. The main theme of Cyberpunk and the inspiration for Blade Runner came about when an author called Phillip K Dicks wrote 'Do Androids Dream of Electric Sheep' in 1968 and this created the genre which has spawned numerous movies, books and now video games under the same style and even title. This was a main part of my research as understanding this art style is ultimately what understanding this porject was about for me.
Research
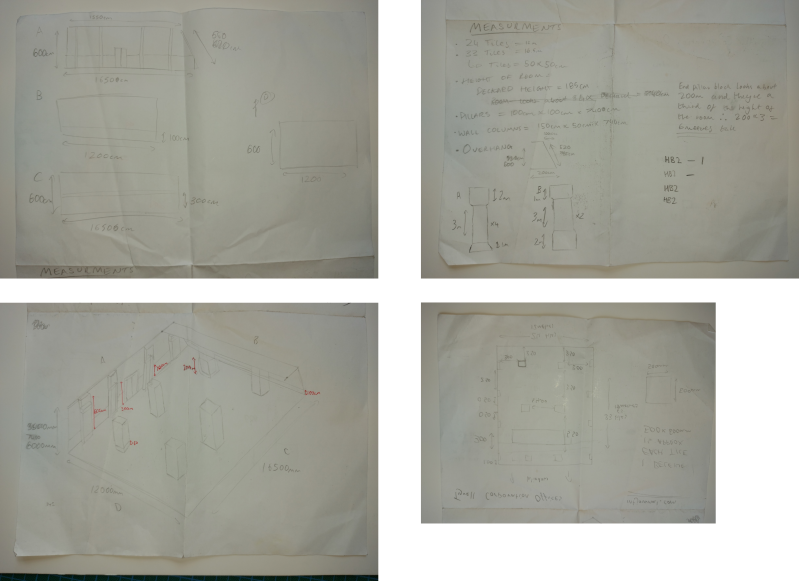
This was the same process used for most of the room. The floor tiles i worked out to be 50cm by 50cm so again i counted the floor tiles to get the length and width of the room. This was the rinse and repeat process to work out the dimensions of the room. This took about a week overall to get the full dimensions and i used a sheet of paper in which I would write all of the workings out that I did onto there.
Rough Measurements Research
The next stage I did after i had done my measurements was to do a ROUGH WHITE CARD MODEL, this was to get an idea of the scale that it would be in and to make sure that all of my measurements would add up correctly. The scale I chose for this was 1:50 as the room was very large and any smaller scale would have ended up with a lot of extra space and a lot more paper used.


This was presented in front of the group at Uni, this was used as a floor to hear feedback both from the students and from our tutor and this feedback was used to influence the next stage of the process. What i learnt from this from the other students and from my tutor and what I learnt was that the pillars needed to be added in and the walls needed more detail including the columns and the tiling. This was implemented into the next stage FINAL WHITE CARD MODEL.

Final white card Model
This was the final model that I handed in, from the student and tutor feedback I worked out that I should:
1. Add doors
2. Add 3d wall textures
3. Add pillars
4. Add table and figures
These things i did to give a bit more detail to the set and make it more recogniseable. I added figures of the 3 characters that were in the scene. I made the 6 pillars with 4 of one type and 2 of the other. I made the wall more 3D with features like columns and door frames. Finally I added 2 doors, one onto wall D and one to wall A, this was done by just cutting a small cut into the foam board and making a hinge which gave the effect of the double doors. The feedback that i gained from the presentation proved very useful for the final model as a lot of it was incorporated fully into the finished product.
Hand Technical Drawing
PRACTICE RUN
As an introduction to this we started off by mapping out the room we were studying in at the time, this room was a lot smaller than my chosen set so it was a different task for me I found, we also were able to make exact measurements of the room which we were unable to do in the final version, however. even though our 2 task differed slightly in what we were asked to do it still helped that we could do this even if it were just to practice the technical drawing side of things.
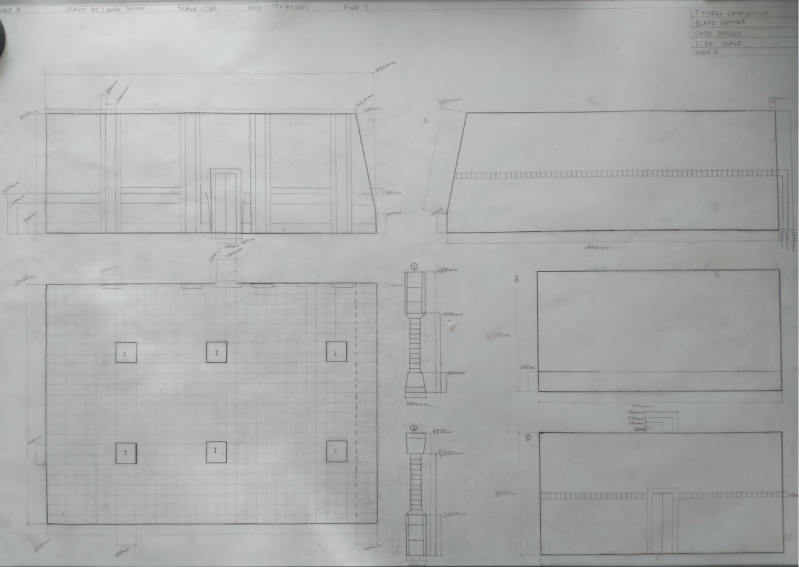
The next stage of the process for me was to make a HAND TECHNICAL DRAWING. This was an important stage as the basis of the final model was to use this to make sure that it was accurate. This stage took me about 4 or 5 days and it took a few tries as well, in the lower left corner you can see the floor plan with tiles and places for the pillars as well as the details about the door and the overhang. These drawing techniques were gathered from both what we learnt with our tutor as well as a book called 'Drawing The Line' by David McHenry which was written as a guide for others to learn technical hand drawing. This made making the walls and column details easier to line up correctly. I also drew the 2 types of pilars in the bottom centre. The bottom left I drew wall B and D and at the top the wider walls A and C. This has allowed to to communicate a very clear depiction of what a room should look like to a set builder and is a very helpful skill for this industry.
Create Your Own Website With Webador